| shot | preview | description |
|---|---|---|
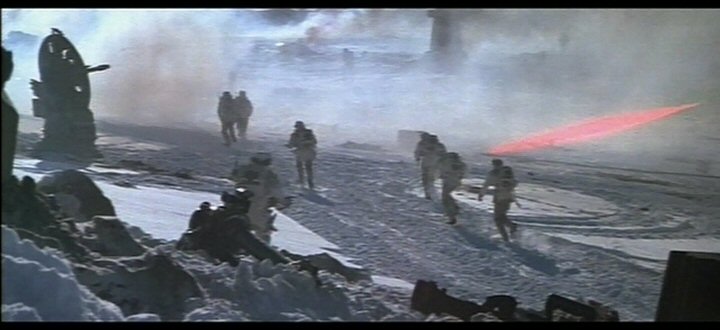
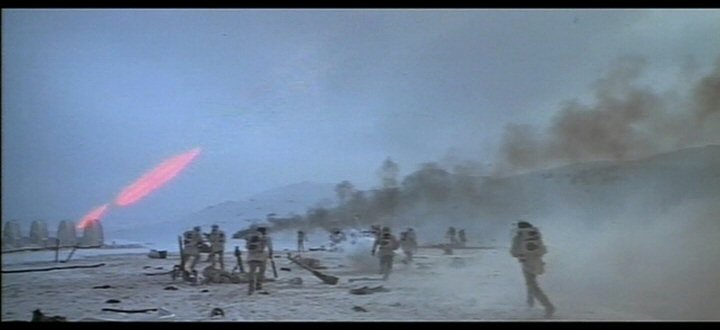
| F001 |
|
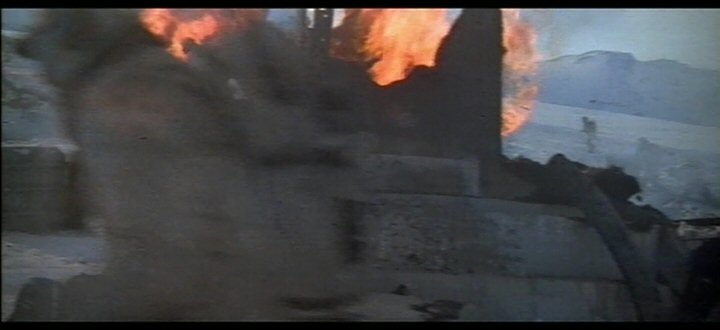
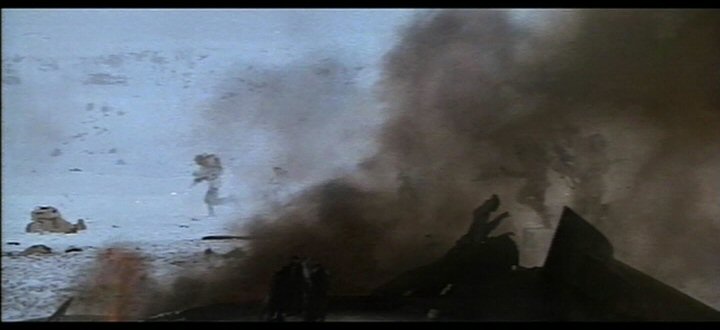
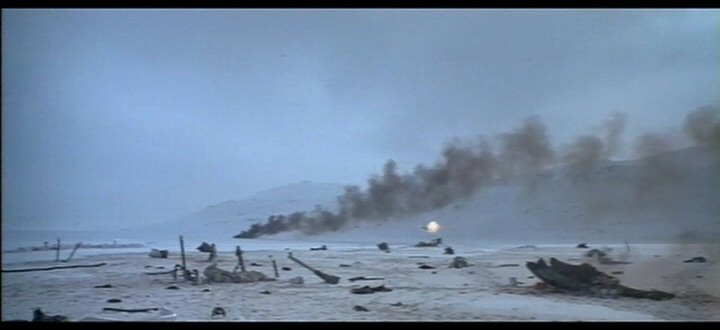
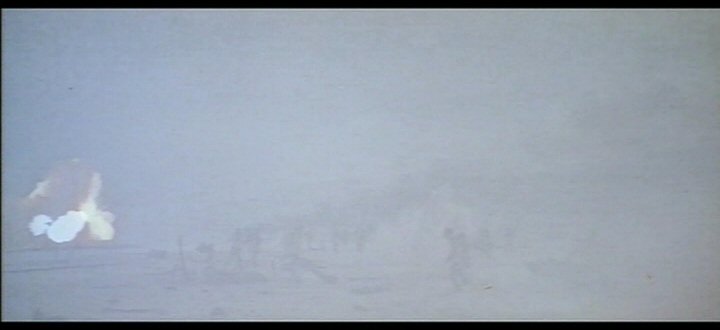
Rebel trenches during the final retreat. Some of the kobbly western foothills can be recognised through the mist and smoke. Troops run from right to left. The remains of a laser cannon turret burn in the foreground. |
|
||
|
||

|
||
| F002 |
|
Retreating rebel soldiers clamber over their own trenches, running from right to left. The sun shines from the direction of the camera, implying that the men are retreating towards the south. |
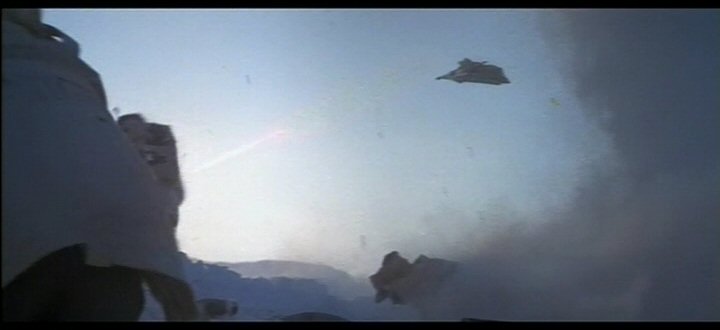
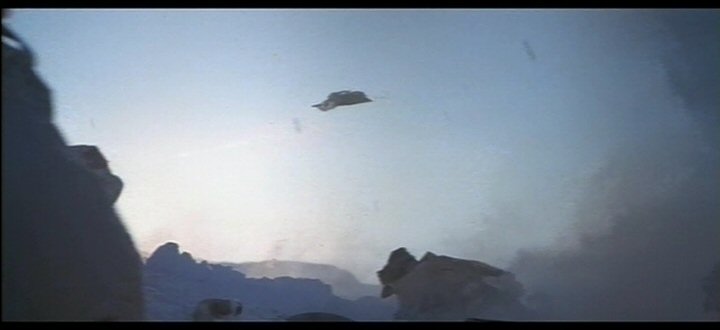
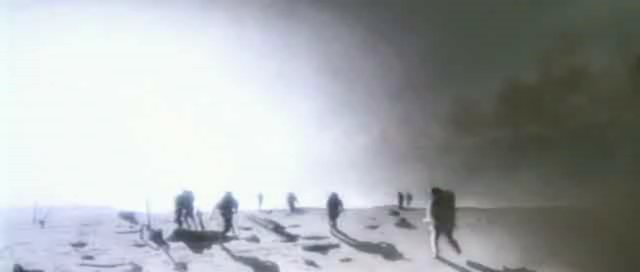
| F003 |
|
Retreating rebel infantry climb across their trenches, and snowspeeders retreat in the same general direction. They appear to be heading towards the sun. If this is morning then they are headed E. |
|
||
|
||
|
||
|
||
|
||
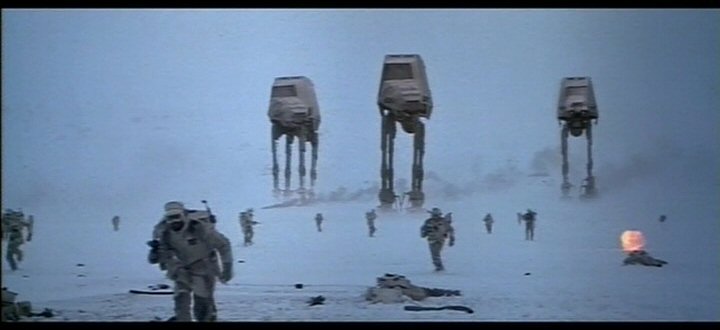
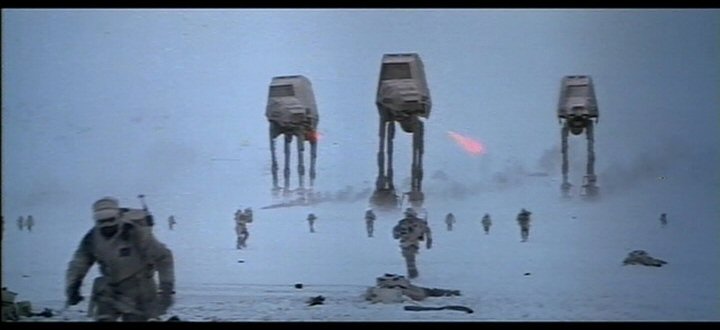
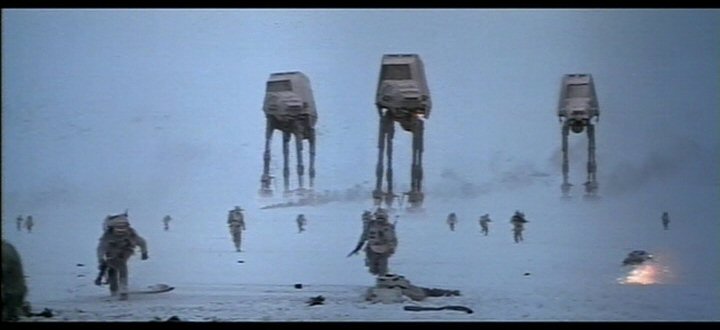
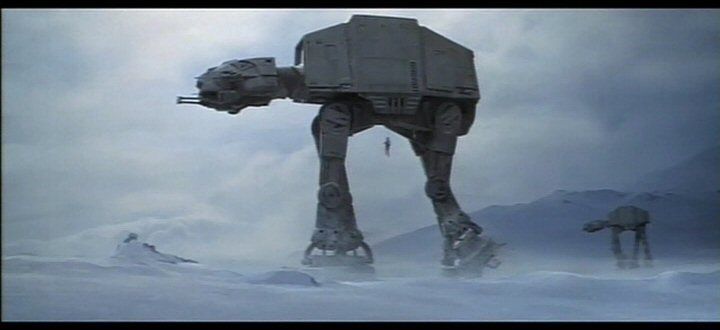
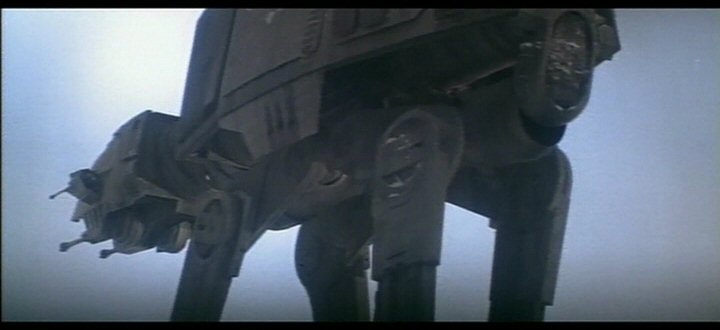
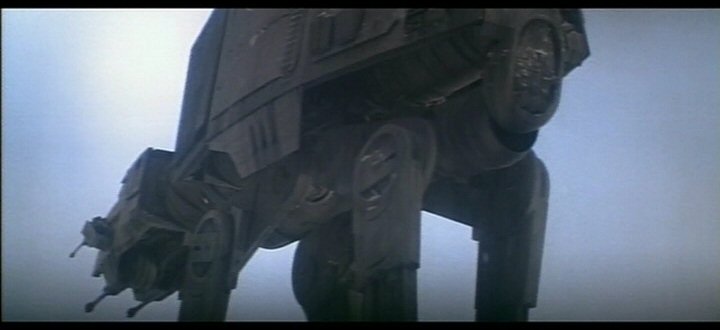
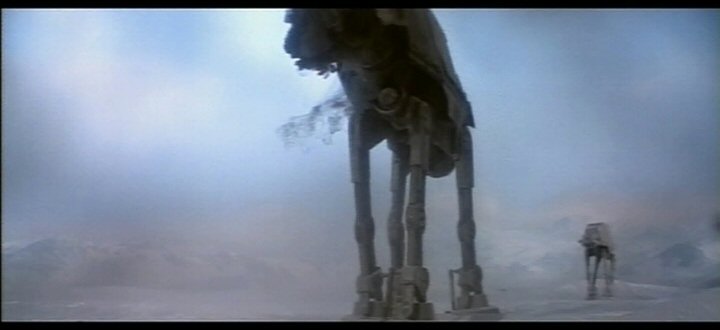
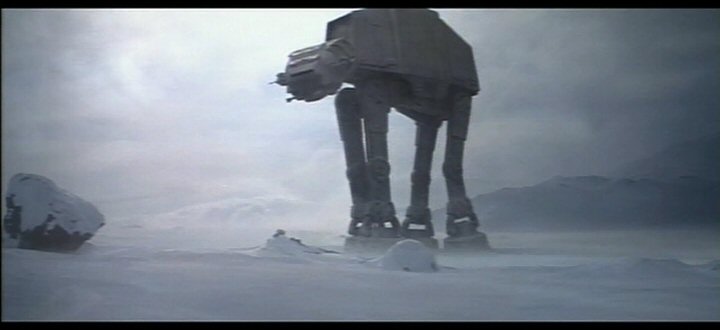
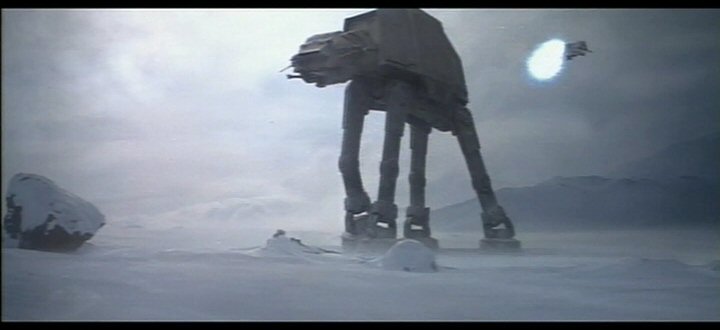
| F004 |
|
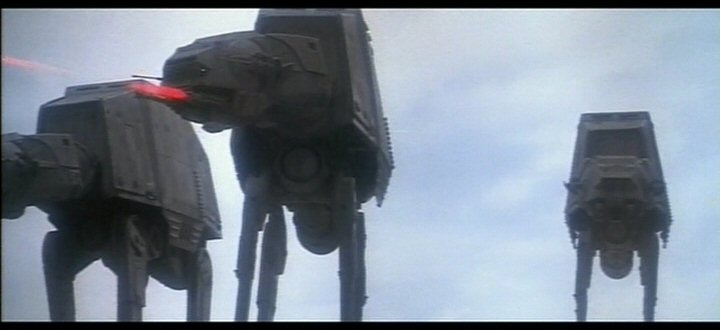
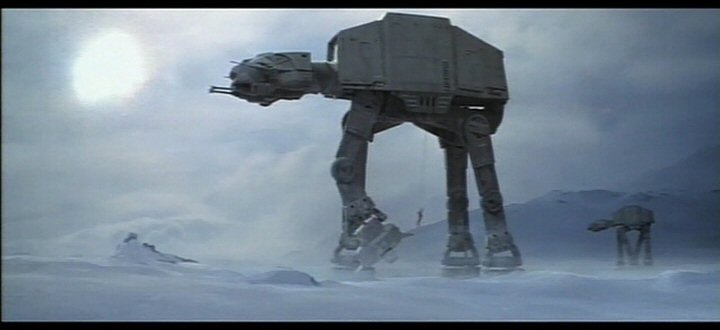
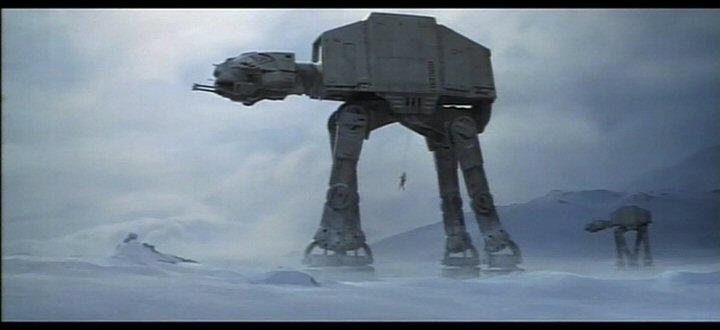
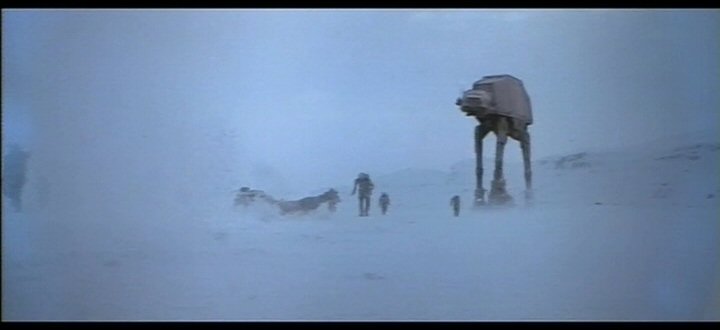
Three AT-AT walkers attacking rebel positions from relatively close range. The walker on the right side, straggling the others, may be the one that Luke will attack from the ground. |
|
||
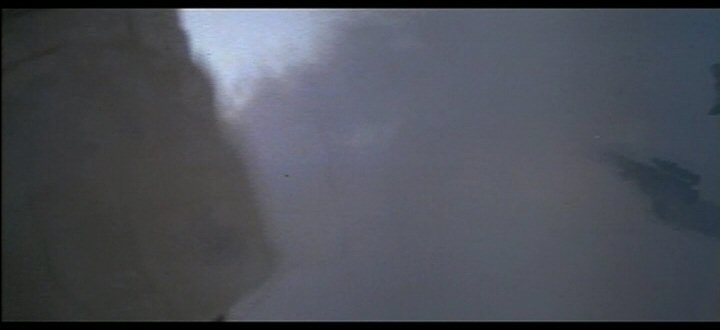
| F005 |
|
Ruins of the rebel defences. Rebel troops rung along a path where the snowy surface is trod rough by the feet of many other retreating men. These particular men are running towards the sun: towards the east if this time is still before noon. These men must be divided from the other rebel troops, visible in scenes closer to the generator, who are running west or southwest. |
|
||

|
||
|
||
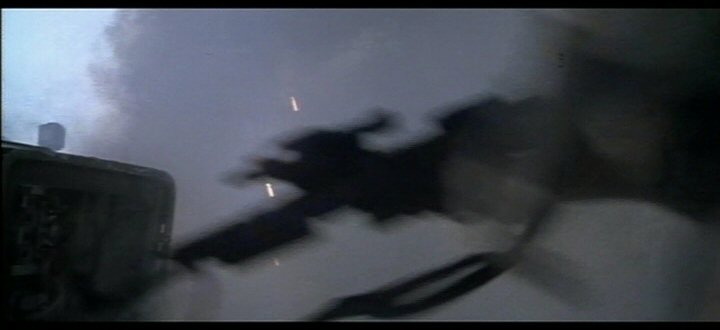
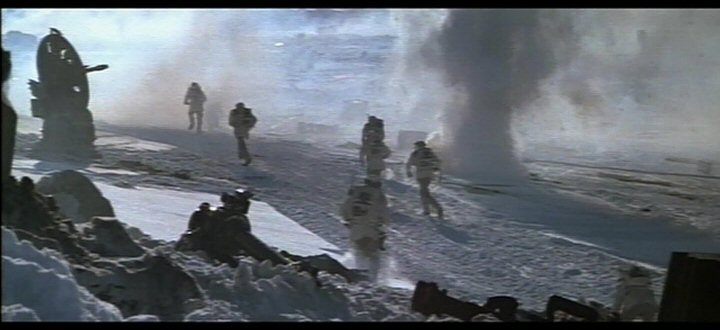
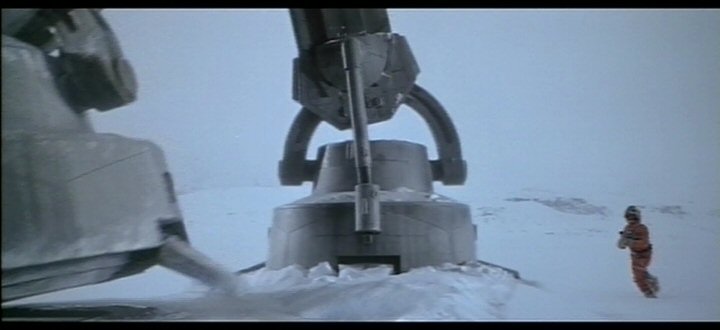
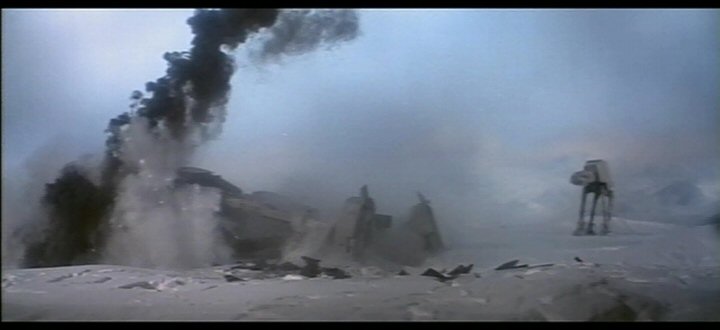
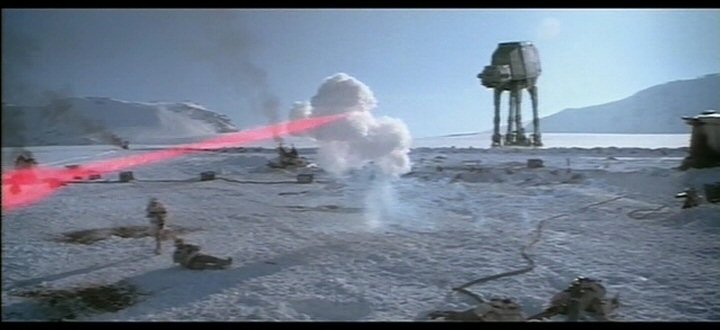
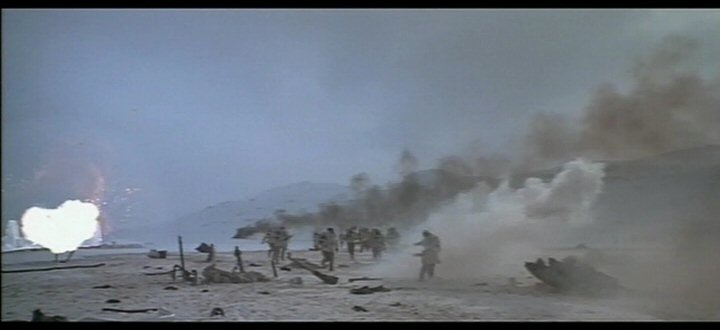
| F006 |
|
Closeup of burning rebel fortifications or equipment, with troops retreating from right to left. The smoke blows from left to right. Foothills are visible in the background. |
|
||
|
||
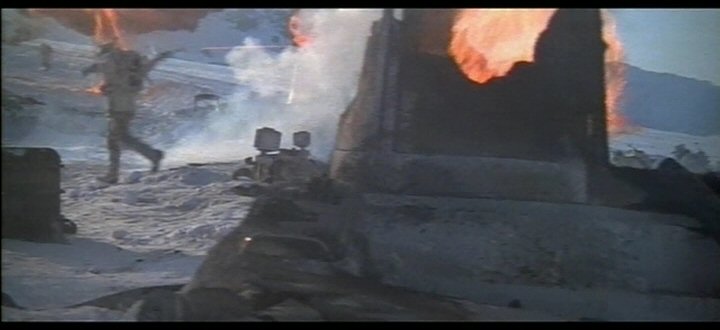
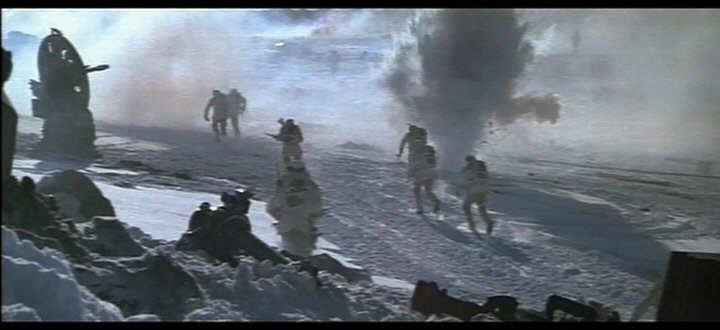
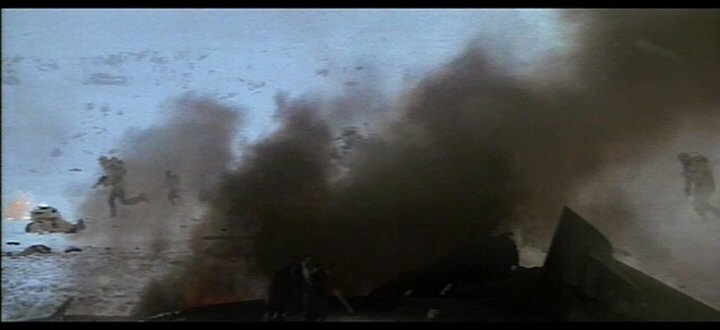
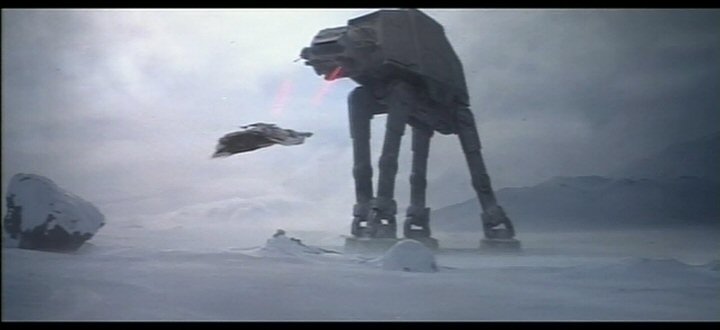
| F007 |
|
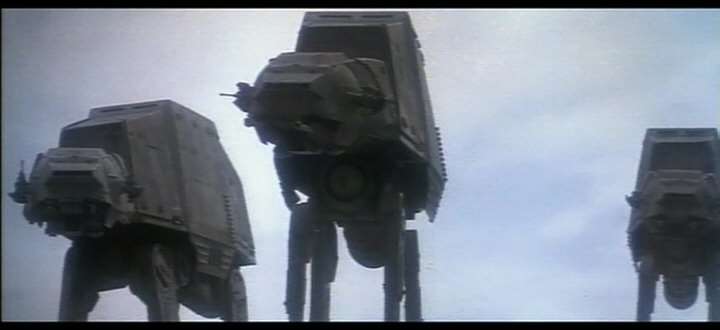
Rebel soldiers flee the advance of 3 AT-AT walkers which are overrunning the rear trenches. Low hills are visible in the background. The wind blows from the walkers' starboard side. |
|
||
|
||
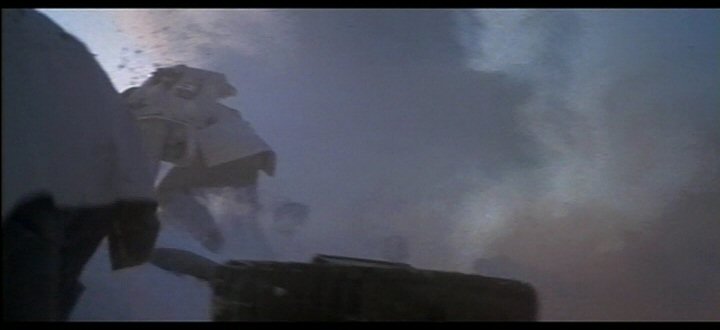
| F008 |
|
Luke Skywalker runs between the feet of an AT-AT walker. The lighting is diffuse and the direction impossible to judge. |
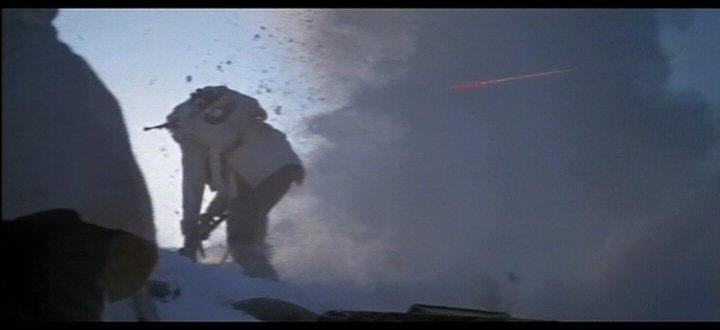
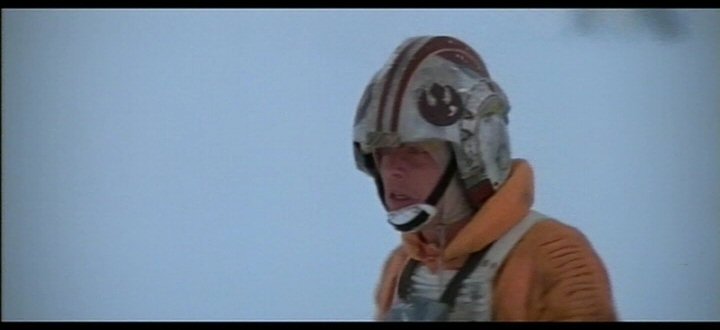
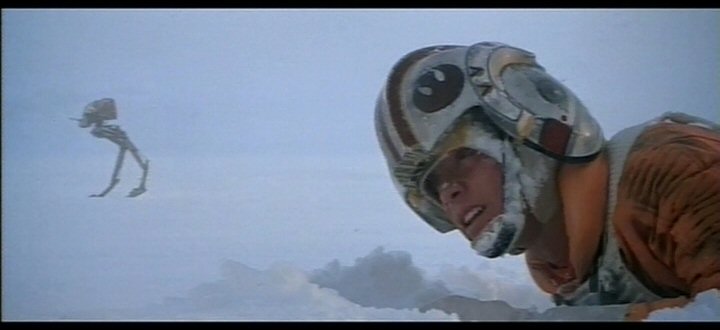
| F009 |
|
Luke Skywalker jogs furiously in an attempt to keep pace with the walker that crushed his snowspeeder. |
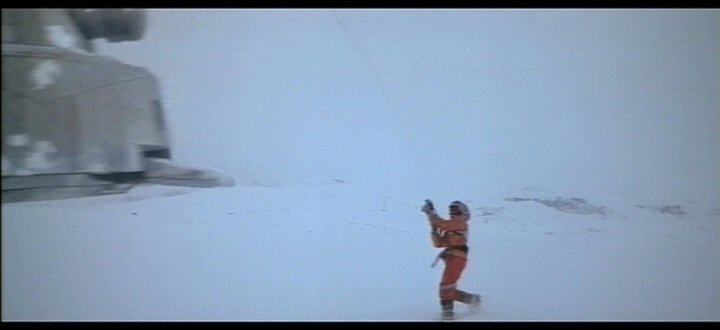
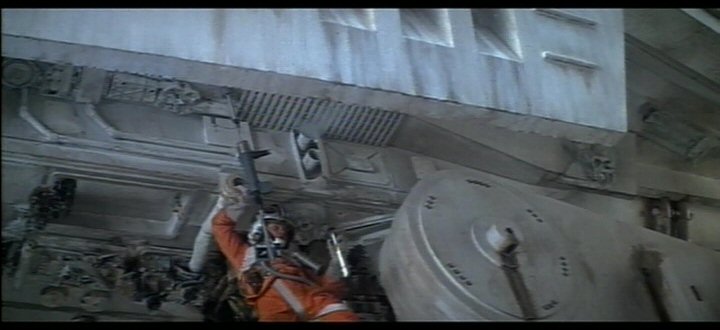
| F010 |
|
Luke fires his harpoon gun into the belly of the AT-AT. Exposed rock in the background suggests that this attack takes place on the edge of the foothills, and not out on the deep ice. |
| F011 |
|
Underside of AT-AT walker with Luke's magnetic grappler attached. To the right side we see a shoulder or hip joint, showing a small oily trail that may be overflown, excess lubricant. |
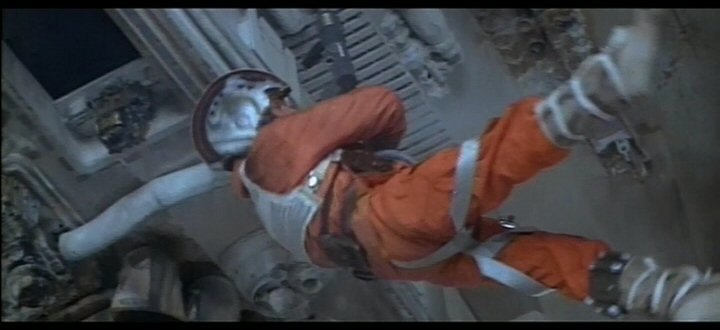
| F012 |
|
Luke rises off the snow, drawn by a cable/winch mechanism. |
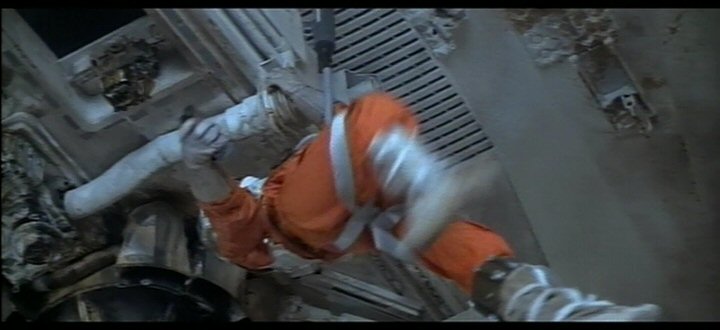
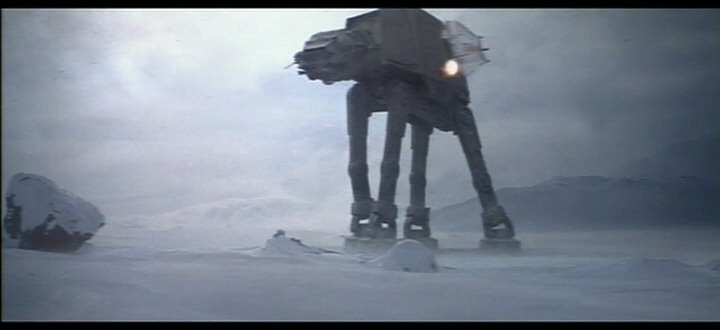
| F013 |
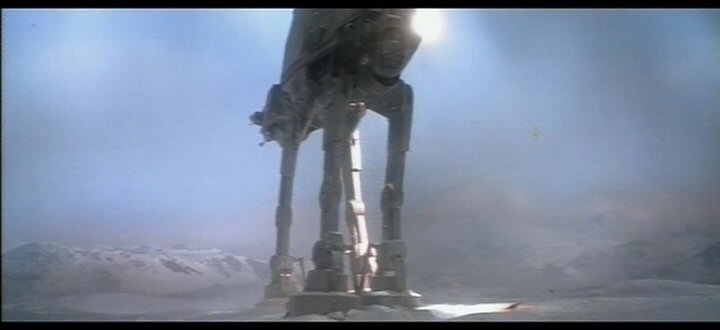
|
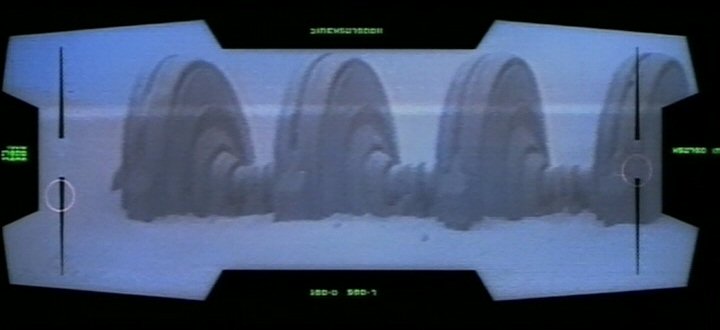
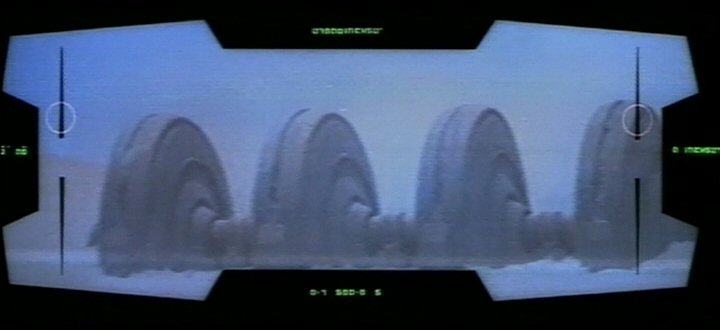
Luke Skywalker hoists himself up to the belly of an AT-AT walker. The sun is not visible. The transient bright lights that occur in some frames are flashes from blasterfire dissipating in either spontaneous shield interactions or absorption by atmospheric solids (airbourne dust or snow). Assuming that the walkers are still heading SW, the topography in the background belongs to the knobbly western hills. The scale of the walker is easily measured from this picture. The AT-AT is between 22m and 23m tall, and not the 15.5m that is commonly and erroneously quoted in many books. |
|
||
|
||
| F014 |
|
Under the side of the AT-AT, Luke draws his lightsabre. Part of the side hull is visible at the top of the picture, including notches that clamp a walker into its landing barge. |
| F015 |
|
Closeup: Luke cuts open a service hatch and tosses in a grenade. |
|
||
| F016 |
|
Luke falls to the ground. |
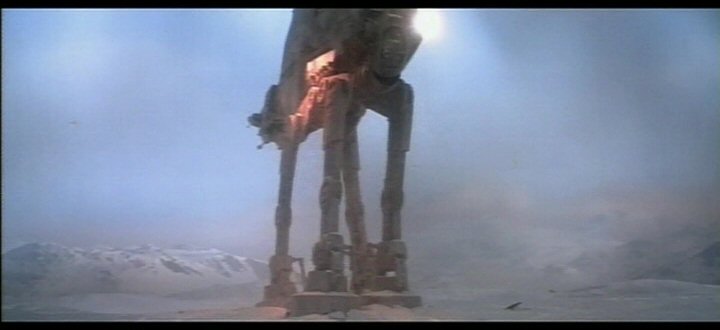
| F017 |
|
The AT-AT, with Luke's grenade inside it. The sky is cloudy, the light is diffuse, no shadows are visible and the geographical orientation is indeterminable. |
|
||
|
||
| F018 |

|
A scout walker strides past the position where Luke fell. This walker has longer legs than the AT-ST walkers seen in the Battle of Endor. Still the sky is clouded and the light is diffuse. This may be related to the AT-ST/As named in EGVV: also longer legged than the AT-ST used on Endor. |
|
||
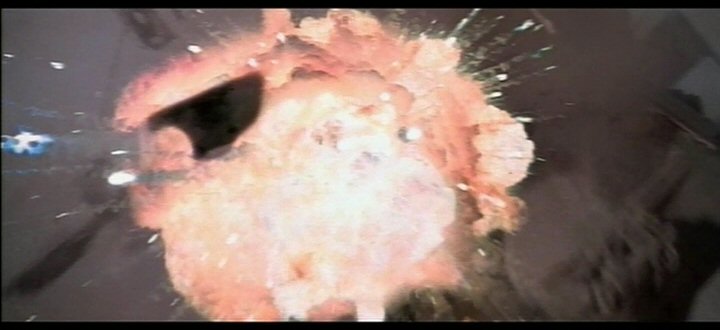
| F019 |
|
Luke's grenade sets off a series of explosions within an AT-AT. The direction of sunlight is undetermined. Low mountains are visible in the background off the starboard side of the walker. |
|
||
| F020 |
|
The final explosion destroys the head of the AT-AT. |
| F021 |
|
The fall of the (now headless) AT-AT walker that was destroyed by internal explosions started by Luke's grenade. Another AT-AT advances in the background. |
|
||
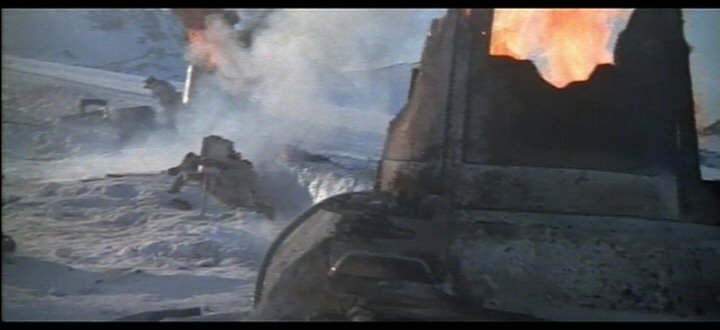
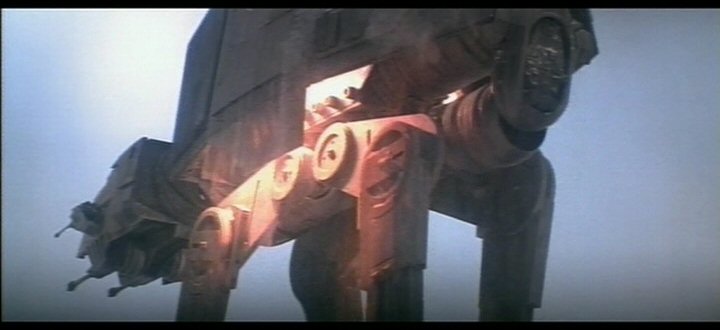
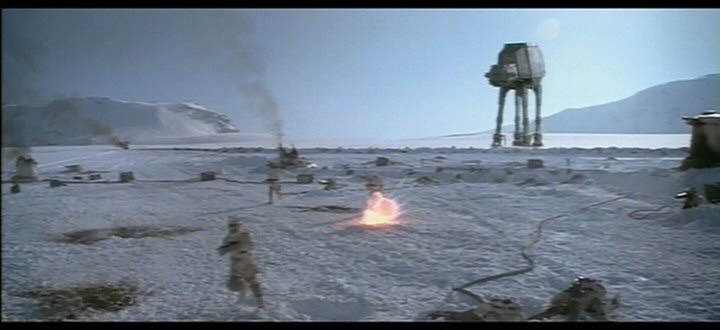
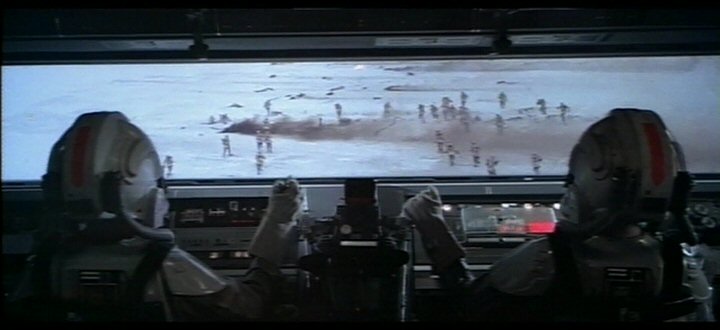
| F022 |
|
General Veers' AT-AT crosses some of the rebels rear trenches. The camera is facing NE and the walker is heading SW or WSW. The walker has rounded the corner pass of the knobbly western hills (left side of picture). The mountains of the Base Range (containing the main rebel base) are on the right side. The large, flat open plain is beyond the horizon, in the middle. |
|
||
|
||
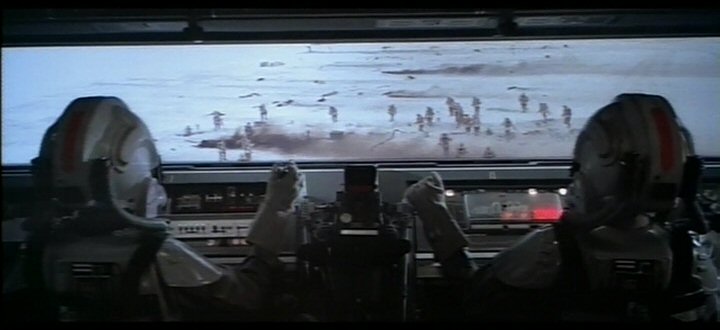
| F023 |
|
View from the cockpit as General Veers' walker strides through the remains of the rebels' rear defences. Troopers run from their trenches and attempt to flee the walkers. Smoke reveals the direction of the prevailing wind: towards the camera, from left to right. This is consistent with the wind direction seen later, during the destruction of the power generator. |
|
||

|
||
|
||
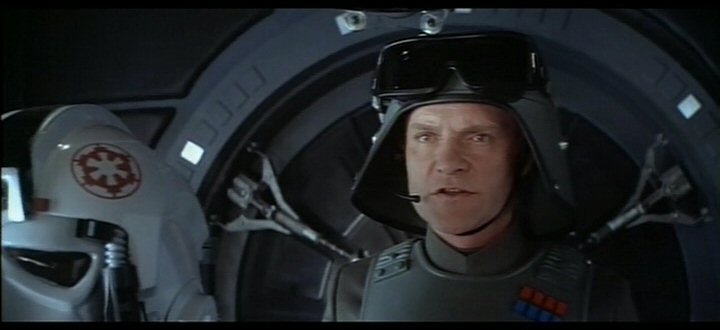
| F024 |
|
In General Veers' AT-AT, one of the crewman reports the distance to power generator: 17.28km. This is consistent with the range of the horizon expected for an AT-AT walker's point of view: 16km on absolutely flat terrain, or up to 39km if the terrain varies up and down by 100m. The Generator is uphill relative to the camera positions in F026 and F030. |
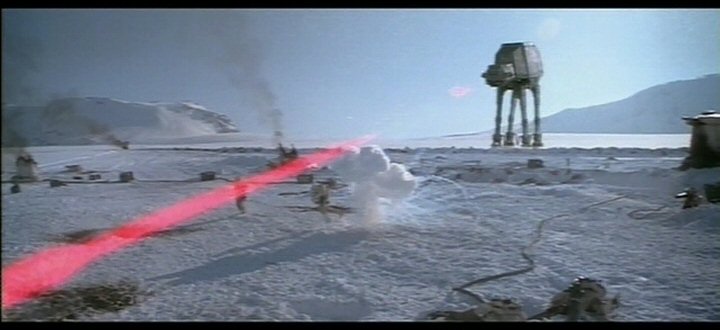
| F025 |
|
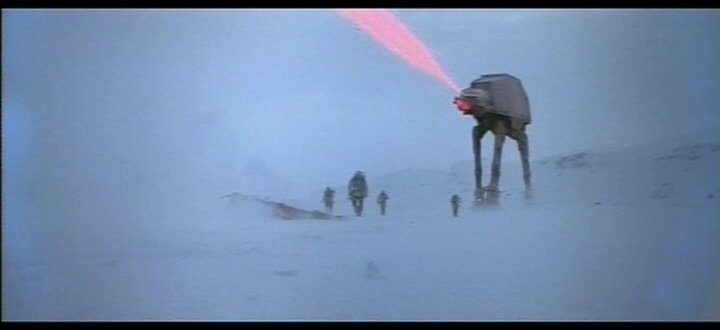
General Veers' AT-AT turns to portside as it fires at a remaining snowspeeder. The sky is covered with patchy clouds and the sunlight direction is indeterminate. The damaged snowspeeder spins off behind the walker, to its port side. |

|
||
|
||
|
||
|
||
| F026 |

|
The snowspeeder shot by Veers' walker careens through the sky and crashes amidst earlier battle debris. The wind blows towards camera, from left to right. A line of hills or mountains stands on the right side of this field. The hills and smoke column appear similar to those in F030, but with the generator off-screen somewhere. |
|
||
|
||
|
||
| F027 |

|
General Veers orders a strike against the generator: "target, maximum firepower!" |
| F028 |
|
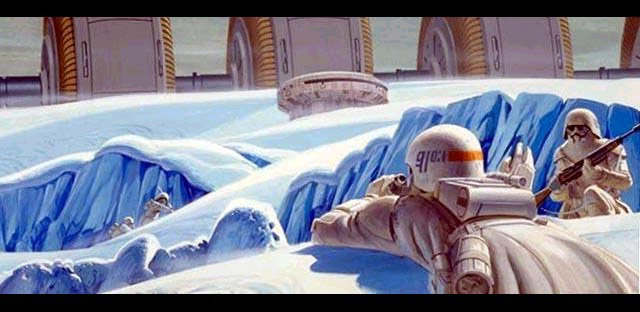
The power generator as seen from through General Veer's rangefinder. What are the darker specks in the snow below the generator? Are they antipersonnel turrets, or just rocks? One of them may be the cylindrical observation post depicted in the painting by McQuarrie, with the generator in the background being hundreds of metres wide. |
|
||
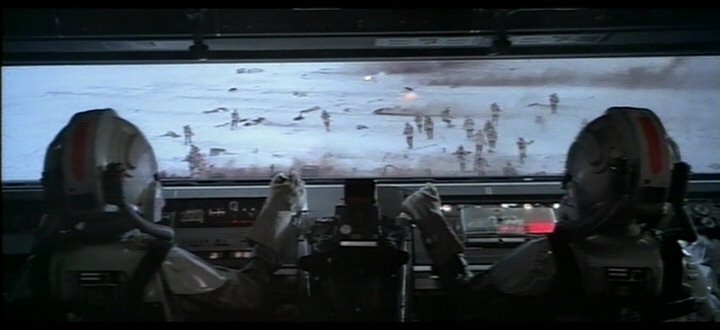
| F029 |

|
General Veers' walker continues through the ruins of the rebels' rear defences, and fires at the generator. A range of mountains is visible in the right background: this is probably the Base Range. If so then Veers' walker is headed west and the camera is facing east. |
|
||
|
||
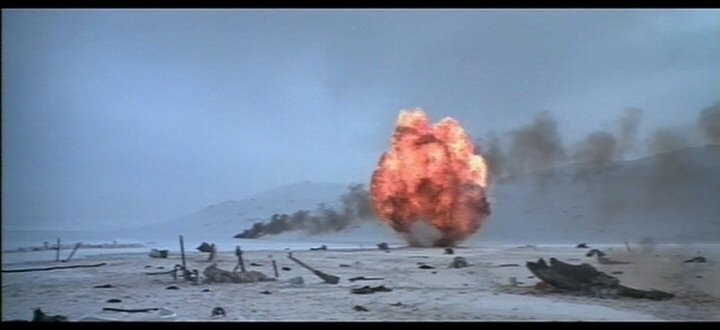
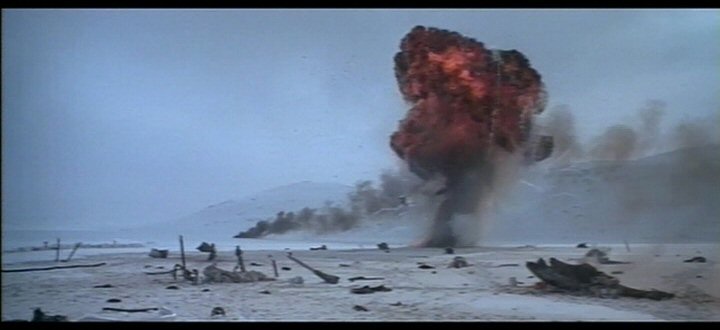
| F030 |
|
The generator is hit by a maximum blast from General Veer's AT-AT walker. This camera position is at man-height, at an unknown distance between the generator and Blizzard 1, which (by the dialogue and consistently with horizon geometry) are separated by about 17km. Smoke from battle debris approaches camera from left to right. This indicates the wind direction at roughly 135° to the line of sight. This is consistent with the wind direction a few shots earlier, when Veers' walker was chasing rebel troops in the same heading. The smoke column is either a huge plume in the background of the generator (if the land is flat), or a plume of modest scale in the foreground but originating on a mound. The scale of the turbulence in the smoke hints that it may be nearby. This source of smoke persists much longer than the snowspeeder wrecked in this area [F026]. Only the hills in the right side of the background stand further to the horizon than the generator. They may be the knobbly western foothills, forming the narrow pass with the Base Range (off the left side of the picture). Rebel troops flee towards the generator, presumably seeking a sheltered way to escape ships on the south slopes. The flash of the explosion casts sharp shadows behind the troops. The shortness of the shadows on the ground implies that the generator is uphill from the men, perhaps at an incline of 10° or more. |
|
||
|
||
|
||
|
||
|
||
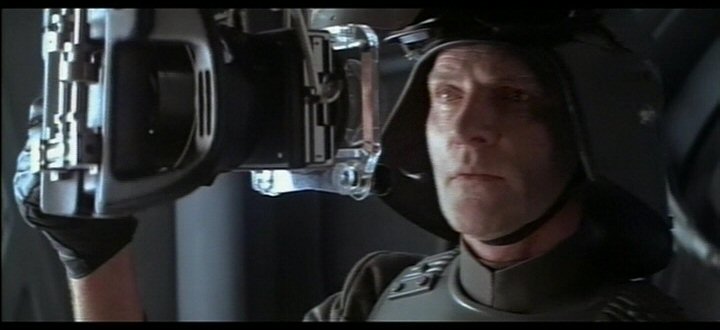
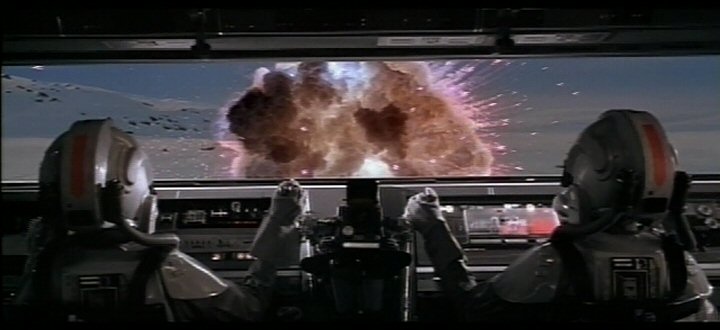
| F031 |
|
General Veers observes the explosion of the generator from behind his targeting scope. |
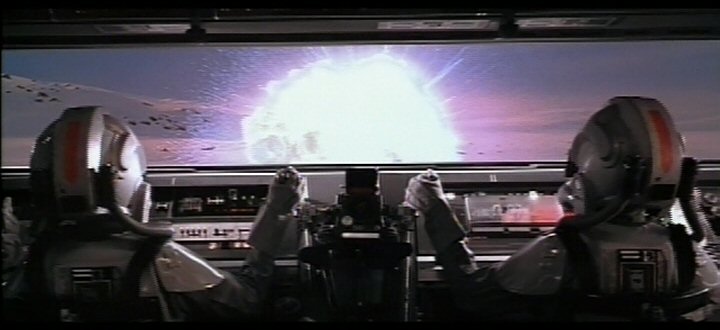
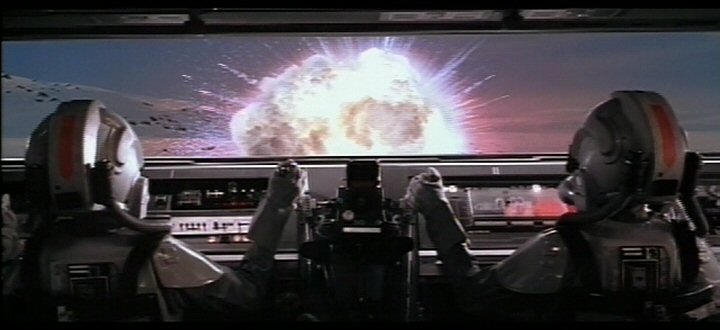
| F032 |
|
Exploding generator as seen from the cockpit of General Veers' AT-AT. The generator is in a shallow pass between a huge mountain range on the left (the southwest end of the rebel base range) and low hills on the right (knobbly western foothills). The centre of the fireball is not exactly on the horizon; (unlike in the ground-level images of F030), but this is due to the walker's advantage of height: the horizon is further away from the higher vantage. Where a man might see a horizon 16km away, the walker crew may see well over 30km. At this stage the expanding fireball still appears approximately spherical. In time its acceleration will slow and halt, and the hot gas will rise buoyantly forming a mushroom cloud before dissipating in the higher atmosphere some minutes later. |
|
||
|
This page was constructed and is maintained by
Curtis Saxton.
This page is neither affiliated with nor endorsed by Lucasfilm Ltd.
Images included in or linked from this page are copyright Lucasfilm Ltd. and are used here under Fair Usage terms of copyright law.
This site is kindly hosted by TheForce.net.