After Effects Bluescreening Tutorial
By Michael Hobson
Here we will go into a short, yet extensive, tutorial on using bluescreen
techniques using Adobe After Effects. Most of my knowledge of this came from
just playing around with the program for a little bit, and reading the After
Effects Classroom in a Book.
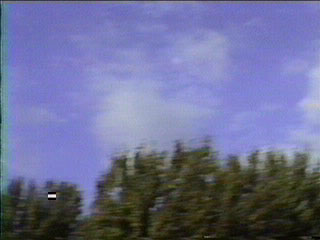
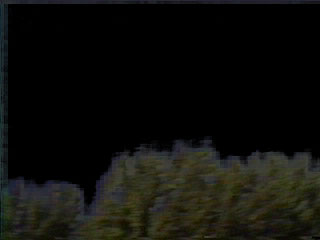
In this tutorial, we'll composite together a shot of the Millenium Falcon
flying over my apartment. Below is the original footage shot on VHS tape
outside my apartment. To import it into After Effects, where you can work with
it, you'll use the File, Import, Footage File. Once the file is input (in this
case, it's an AVI file), you'll want to create a new Composition. When After
Effects imports footage, you'll see all the information you'll need right in
the Project Window. In this case, the footage was 320x240, 10:15 at 30:00fps.
10 seconds and 15 frames, running at 30 frames per second (standard video
recording speed). You'll want to keep these settings for the Composition you
make. Same frame size, same frame rate, same length. You'll see the blank
window pop up on your screen. Now go into the Project Window and drag the
footage file into the Composition you just made. You'll see the picture pop up
in the Composition Window.
We'll be dealing with only one frame, for the purposes of the tutorial. This
is, however, a 10 second shot, and all the effects and work we do here will
effect the ENTIRE clip. I chose this frame because the ship is at it's closest,
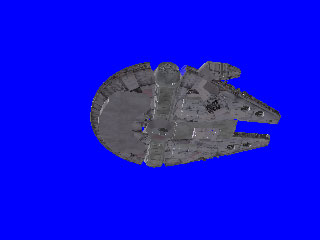
and I can demonstrate the how-to's and the why's. Below is the shot of the
Falcon itself, against a bluescreen. The ship was created as a 3D model in
Lightwave, with the final render done with a flat blue background, to simulate
a bluescreen. Since the footage I shot was captured at 320x240, 30fps, I did
the same thing in Lightwave, telling it to render the movie in that size at
that frame rate. I saved the rendered file as a sequence of RGB images in
24-bit IFF format. To import this into After Effects, use the usual File,
Import, Footage File feature. When you highlight one of those frames, you'll see
an option pop up at the bottom of the Open Window that, in this case, read
"Amiga IFF sequence". Check next to that and hit OK. Then entire
sequence will be input as footage. Create another Composition using the same
settings you used before, and drag this new footage into it.
Now we get into it. Go to the Effects menu, Keying submenu. Choose Color
Difference Key. This is your major bluescreening tool. As soon as you click
this, you'll see the change immediately. It'll look like this:

The blue has been replaced by black. In After Effects, it's quite simple to
see how something will come out if you remember this simple rule: If it's
black, it WON'T show up in the final shot. So we can see from the above shot
that the ship will be inserted, but the blue background will be completely
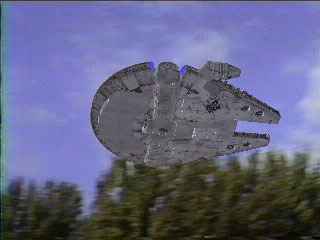
removed. At this point, it's possible to go ahead and insert the ship into the
final sky shot. It looks like so:
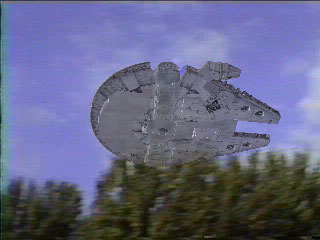
But wait.. what's this? Are those clouds and trees I see right through the
ship? Why, yes it is. This is why we start getting into the detailed parts.
We'll need to go into the Effects Window for our Falcon shot. You'll see two
small pictures at the top of the window. One will show the "before"
image, the other shows the "after" image. Click on the small
"B" underneath the "after" window.
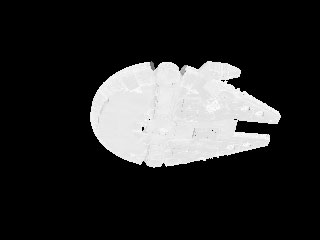
Now, the "B" channel is the actual matte that the program uses to
composite the images. The matte image looks something like this:
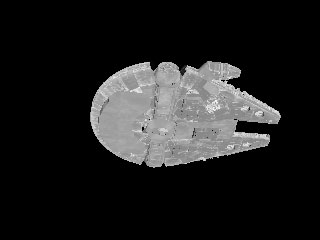
Note how the ship looks a grayish color. Remember our rule: If it's black,
it's taken out. If it's white, it stays in. If it's gray, like this shot, the
ship will take on a translucent appearance, because the ship is not being
composited at full opacity.
As a matter of fact, using the old optical technology for bluescreening,
this was sometimes used on purpose. If you watch the Hoth battle scene from
Empire Strikes Back, you'll notice that during the interior shots of the
snowspeeders, you can often see right through the ship to the snow beyond it.
This was done to reduce the tell-tale black line around the ships when
superimposed on a white background.
Luckily, with today's digital technology, we don't have to worry about the
black line. The computer will get rid of it for us. So here's what we'll do
with this matte shot. In the Effects Window, go down to the "Partial B
Gamma" slide, and max it out. Your matte (B channel) should look like this
now:
What we've done is bleach out the image to where the ship is solid white, or
as close as we can get it. Remember, if it's white, it stays in. Now, if you
composite the shot into the sky background, you'll get this:
Note that the clouds and trees are no longer visible. Yes, it does kinda
look like you can still see the trees, but that's just the coloration on the
ship. It's solid. But now it brings up another problem. The Falcon is in front
of the trees. The tops of the trees are over 30 feet away. Makes the ship look
like a little model I filmed. So what we have to do now is put the trees in
front of the ship. First step is to create a third Composition. Once you've
created it, drag the original sky footage into this new composition. We'll be
doing some bluescreen work with this shot using the sky as the world's biggest
bluescreen. Once you've imported the footage, apply the Color Difference Key to
it. The only thing you'll see is the image get a little darker. In order for
this shot to work, we'll have to do much more fiddling with the mattes than we
did before. Go into the Effects Window and look at those preview shots. First
thing we want to do is look at the "A" channel. The "A"
channel, so far as I know, shows you what will be staying in the shot, in a
picture sort of format. Right now, it looks something like this:
Yes, it's black & white, but it's only a preview shot. The first thing
we want to do is adjust the "Partial A Gamma". Reduce it to NOTHING.
The screen will turn solid black, meaning that nothing will be composited, but
we're not done yet. What we've done is get rid of the sky. Now look at the
"B" channel. This is your matte, and right now it looks like this:
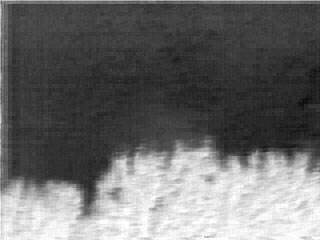
Aha.. now you can see what we're doing here. The white is the trees, which
will stay in. We want to adjust the "Partial B Gamma" again. Move it
up the maximum. The screen will look almost solid white. Now click on the
"alpha" symbol under the preview window. You'll see the same bright
white shot that was in the "B" channel. (the alpha channel is a blend
of the A and B channels). What we're looking for is white trees, black sky.
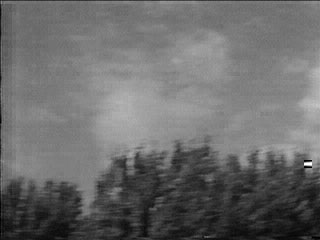
Keep the trees, get rid of the sky. To ensure we get the proper matte, we'll go
down to the "Matte in Black" slide, and move it up to around 200.
This gets rid of the sky, and leaves the trees nice and white, like so:

The final bluescreen shot of the trees now looks like this:
Sure, the edges don't look all that good, but it's being composited right
back onto itself, so the original footage will blend right in. Now what we want
to do is put this into our regular sky background. There's an important thing
to remember before we do this. We have to make sure that everything goes
together in the correct order. Back to front. The original sky shot is already
in this Composition. We want to put the Falcon in next. Then put the
bluescreened trees on TOP of the Falcon, to make sure that they're in front of
the ship. Our shot now looks like this:

Still doesn't look quite right, does it? Now what we have remember is that
I'm not filming in Panavision. I used a regular old VHS camcorder, which just
doesn't look all that good. The Falcon in this image is just way too sharp. Our
next step is to apply a small blur to the ship. Make sure that in the
Composition Window, the Falcon footage is highlighted. Now go into Effects,
Blur&Sharpen, Fast Blur. In this case, I applied a Fast Blur at a 1.0
value. When you change the settings in that Falcon Composition, it also makes
the changes to any other Compositions using that footage. The final shot now
looks like this:

The shot is done! Now go into Composition, Make Movie. The Save screen will
come up. Choose a directory and a filename. If you're making it into Quicktime
Format, you'll need to go ahead and type the .MOV extension. Once you do that,
the Render screen will come up. Go into the "Current Settings" and
change the Quality to "best", Resolution to "full". Click
OK, and then go into the "Lossless" settings. I changed mine to
Quicktime Movie, and the Format Options to Sorenson Video, which is the same
format that Lucas uses for the online trailers, and the same format that
"Troops" is in. Once you change that, click on Render. Wait for it to
finish, and you're done! In my case I now have footage of the Millenium Falcon
flying over my apartment! I don't have a tripod, so the shaky camera kinda
screws it up a couple times, but it was only a test.

![[TFN FanFilms Now On YouTube.com]](/fanfilms/images/fanfilm-youtube.jpg)